
Years ago (early 2000’s) when the robotic “aides” started to be popular in households, I somehow convinced my parents to buy not just one but two of these robots. I will explain more about the reasoning behind two later in this post. While these were cool, at the time, the technology did not really work well, at least for a property larger than a 1/4 acre (my estimate) this robot is designed for.
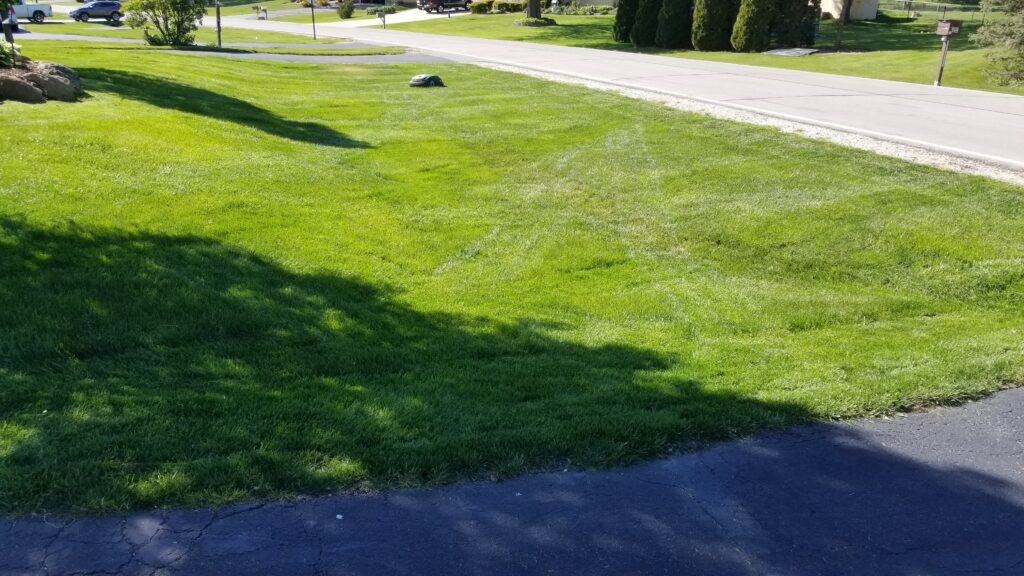
As you can see from my picture it is quite an interesting thing to see in person.
What is a RoboMow
- Manufactured in 2003
- Had a $1,999 price tag for an entry level unit! (in 2003) In 2021 that is the equivalent of $2879
- 5th generation of the RoboMow RL Family
- Weight 50 Pounds, add another 28 pounds when you have the battery pack installed. Total of 78 pounds +/- 3 pounds.
- 3 blades with a cut width of 21″
- 3 motors spinning at 5800 RPM
- Mulching capacity comparable to a 5 HP mulching gas mower.
- Blades due for replacement every 200 hours of run time.
- 24 month warranty, battery pack 12 months.
- FriendlyRobotic never really rated it’s “mowing area” size.
Around 2013 ish FriendlyRobotics sold off the RoboMow to MTD. The techs at MTD Products in the US have made it quite clear that FriendlyRobotics provided them ZERO software or tech guides for these earlier machines. IE if you need to find service for these older units you better know someone techy, or who has them, like me!
Why a reinstallation?
The simple answer is that over time, we realized our property was much too large to cut with this mower. Remember this is early 2000’s technology and the lithium-ion battery, was not a thing yet. You could get about 1.5-2 hours of run time off a single charge from the lead-acid battery. When I hit my teenage years, I found I got a greater benefit of throwing on a tank top and cutting the grass with the riding lawnmower. First, it was done in about a half-hour, the entire property, and second I was able to get a tan. Lastly, I did not have to babysit the robot, drive it to the back shed to charge, and have to drive it back to another zone the following day.
So away in storage, the mowers went. Of course, over time we got used to just cutting the grass, “looking out” for the mowers perimeter wire was not a priority. Any type of utility work ended up slicing the wire, yes it is easy to patch, but once you no longer know where the cut is, makes a fun task of using an AM radio to “tone” the wire. After we installed the irrigation system, the wire was really torn up. We were so used to mowing the lawn, that the idea we put a wire around the entire property was mind-boggling to us. It was almost irritating every time we had the long task of untangling the wire from the trench diggers’ teeth.
Just recently I discovered the mowers in our storage and thought it would make a cool post. So I invested in a few parts to make the mower cut again. This required my time to relay 1 of the 7 previous zones.
Forgot to mention: also replace the battery pack. Sadly the battery technology is so poor that long-term storage renders the battery pack useless.
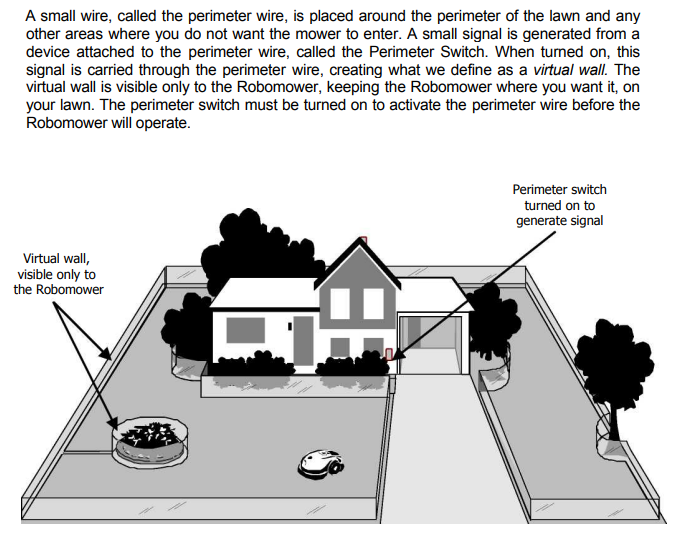
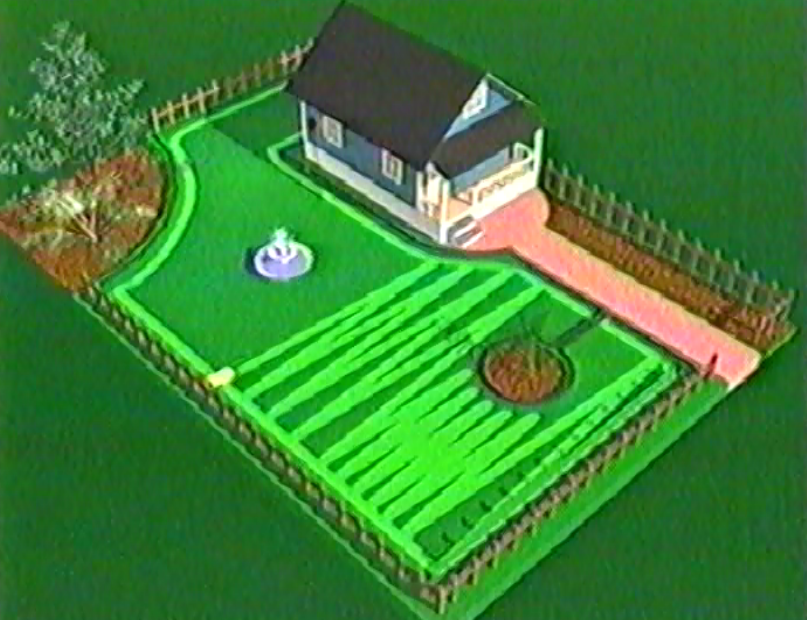
What is involved, why a wire?
There is a limitation to the width of an area the Robomow can effectively navigate through in order to move into another larger, but attached area. A narrow pass is defined as an area that narrows down substantially from the initial width and in which the Robomow must pass through in order to access and cut other zones, an hourglass shape. The minimum distance for an effective narrow pass is 5.5 feet between perimeter wires. The larger a pass can be made, the better access Robomow will have between the zones. This will greatly improve the effectiveness and efficiency of the mower
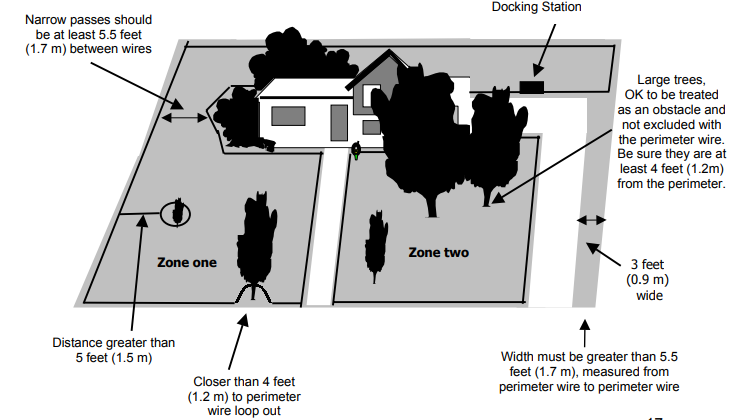
As you can see from the diagrams above, there is a significant issue when you have tight spaces. Any place which will have spacing closer than 5.5 feet wire to wire will need to be cut manually. The mower won’t be able to navigate these areas. You can use the controls on the mowers controller to manually mow these areas, defeating the purpose of not needing to mow. But this mower is very large so it makes sense when you see it in person. In my front yard, this left me with one area which I would not be able to mow “automatically”. Below is an example of this limitation. Looks like that planter bed may end up being shrunken in size.

Parts I had to "repurchase"
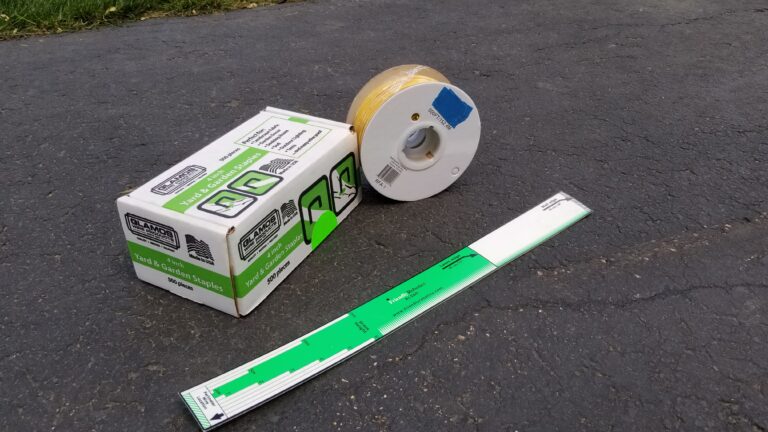
I had to aquire the following from my local supplier:
- 18 gauge wire (find it in the “wireless pet fence” area of the store. The same type of wire is used for pet containment systems. Expect to pay about $30 for a roll of 500 feet.
- Landscape staples that are needed to affix the wire to the ground. Over time the wire will begin to be overgrown by the grass and you will not see it. Expect to pay around $30 a box for 500, you need a lot of them.
- My original “RoboRuler”.
As explained in the owner’s manual super important to have the wire as tight to the ground as possible. This is to prevent a trip hazard, but more importantly, if you use an edge trimmer, you can bet your hard work that it will for certain find any single place that has a loose spot.
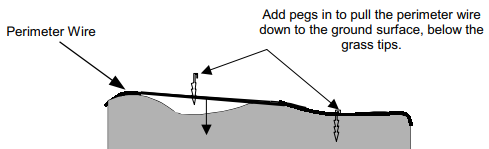
IMPORTANT
Any sharp turn is a recipe for disaster. As the manual puts it: “Care must be taken not to create a turn sharper than 90 degrees when setting up the perimeter wire. A turn sharper than 90 degrees can cause the Robomower to lose track of the perimeter wire.“
In other words, you will notice your RoboMow going across your neighbor’s lawn. Ask me how I know.
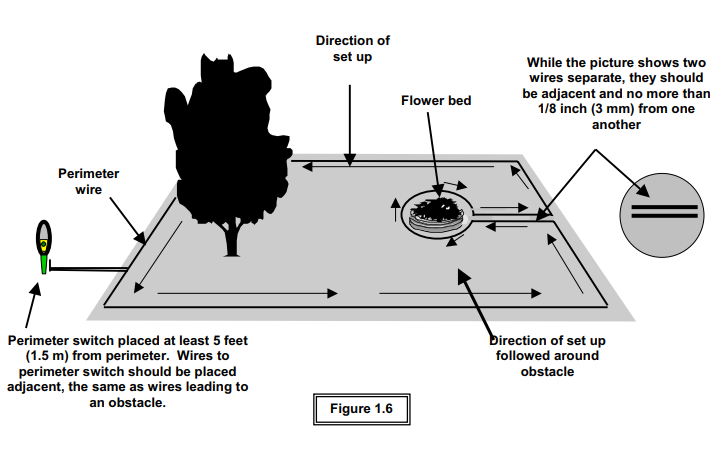
Any obstacle in the lawn shorter than about 6 inches will need to be wired around, as shown in the picture above. Any time you lay the wires within 1/8 of an inch or basically twist them together they will cancel out the signal the mower looks for. In other words, the robot will drive over them. This is awesome because you can put a barrier around say a birdbath in the lawn. In our back lawn, we did this around trees and the firepit mainly because I did not want the mowers bumper getting scuffed up.
Theft Guard - ON (S%&@ I forgot the unlock pin)
Robomow has a feature called “Theft Guard” the idea is to prevent theft by having a lockout if the mower is removed from its mow zone. The downside is if you forget the pin, you are really in trouble. Sadly after it sat in storage for close to 10 years I forgot it. Unless again you know someone like me, who can work on these units, you will need to try all possible combinations (it’s a 5 digit code). Also after so many attempts it will lock out and require a technician to unlock. The new owners MTD do not know or have documentation on how to do this.
I forgot my code, thankfully there is a “service technician” pin that can be entered to override this feature. For the security of all others who own a 20 some year old Robomow, I will not discuss how this is possible. Sadly plenty of owners had to pay big bucks to ship their mowers to service techs to have the pin reset because they forgot it over the winter season.
The first mow
These mowers are designed to be running frequently. For example, if you only mow once a week this with be a shock. You need to run your Robomow every day. The idea is that the sections that the mower misses are not so obvious. It’s also important since tall grass does not do well with these little blades.
If you upgraded to the even more expensive model it had a charging dock and the mower would automatically go out and mow then recharge. Sadly this was not an option for my property since we had more than 1 zone. Also at the time, I did not like the idea of the mower sitting outside unattended.
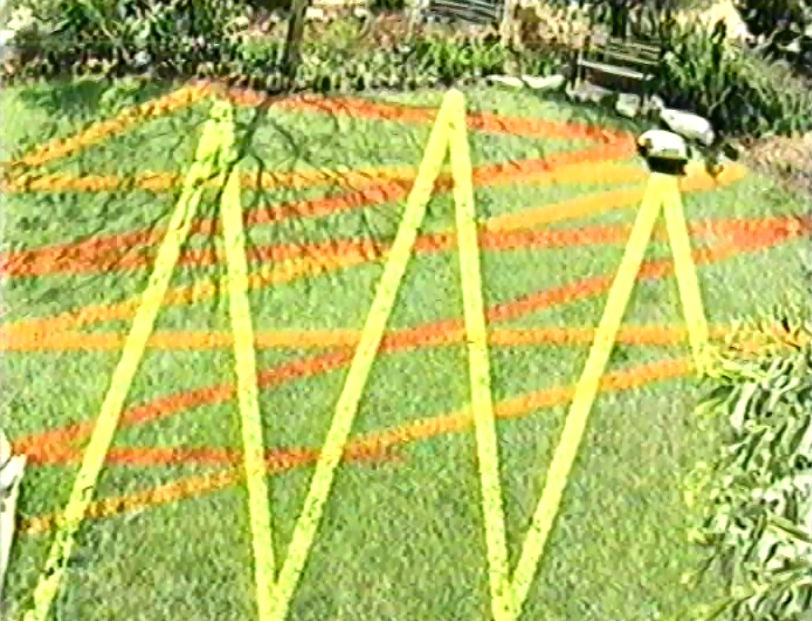
Now back to the first mow. You can expect a few spots to be missed. Again over time, the mower will get them…. hopefully. When you start the mower it will locate the perimeter wire, let’s hope it’s not lose any place. It will begin to drive around the perimeter. After it makes a few rounds, generally 2-3, it will turn into the lawn area and make what they called a “systematic cut pattern” it will cut in a strange v-shaped pattern.
For your enjoyment, I attached two screen ships from the actual VHS tape which shipped with the mower. Yes VHS, this thing is really old! As you can see it is not going to give your lawn a stripped appearance.
Here are a few pictures of the first cut

Was it worth it?
At the end of the day, the big question is, was this worth the work?
I would say yes. It was fun and nostalgic to once again have this mower on my lawn cutting. I have come to the conclusion that to expect them to be able to keep up with the entire property is not a realistic expectation. When we purchased the second mower, we anticipated having the two mowers would speed up the results. Well, it did help in the back yard since, the backyard had several zones, in the front yard they would just bounce off of one another.
Would you buy another if you had a chance?
Without hesitation! Modern-day units have much better programming and even GPS, wifi, and sometimes cellular connections. Which means they are frequently updated! Also, modern-day units have modern battery technology like lithium-ion batteries. These batteries weigh less and last much longer. The best thing about a modern robotic mower is that they cut in a normal cut pattern, instead of that funky triangular pattern. Meaning they will cut more efficiently instead of cutting over the same place several times.
While my unit seems to have some type of GPS technology, I do not think it was ever programmed to avoid mowing over the same area several times.